FAQ
Trouvez les réponses à 18 questions fréquentes sur eRECEIPT, organisées par thème.
General (9)
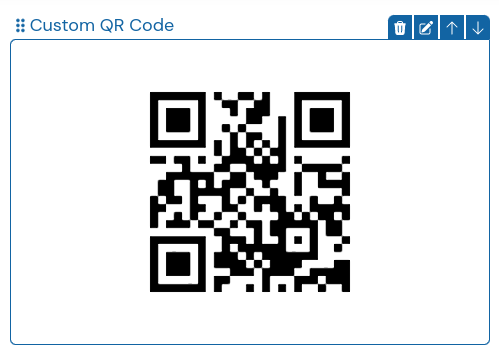
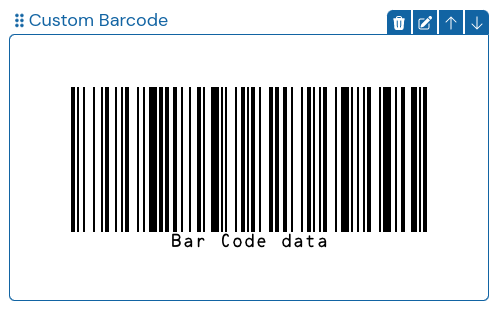
QR_CODE and BAR_CODE custom-sections
Custom-sections of type QR_CODE or BAR_CODE let you add a bar-code or qr-code with your custom data to the receipt. The code will be rendered in the selected encoding. The character limit depends on the encoding of the bar-code. The following encoding types are available:
-
CODE128
-
EAN13
-
UPC
-
EAN8
-
EAN5
-
EAN2
-
CODE39
-
ITF14
-
MSI
-
PHARMACODE
-
CODEBAR
-
CODE93
-
INTERLEAVED2OF5
For more information about custom-sections have a look at this article.

NOTE: The QR code of the custom-sections is independent from country specific regulations, which require specific data to be encoded in a QR code. For more information on country-specific fiscalization requirements, check out our other solutions or get in contact with our sales-team.
Popular use-cases
Section intitulée « Popular use-cases »IMAGE custom-sections
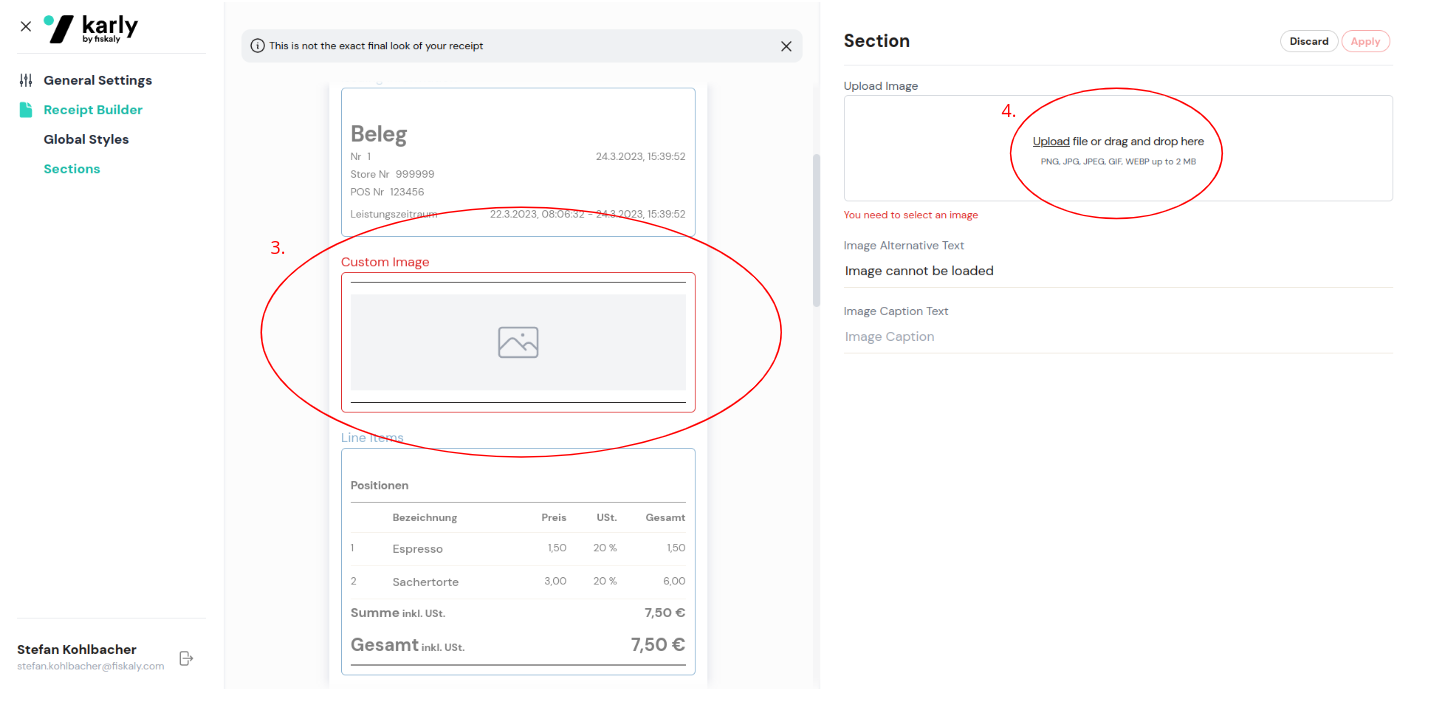
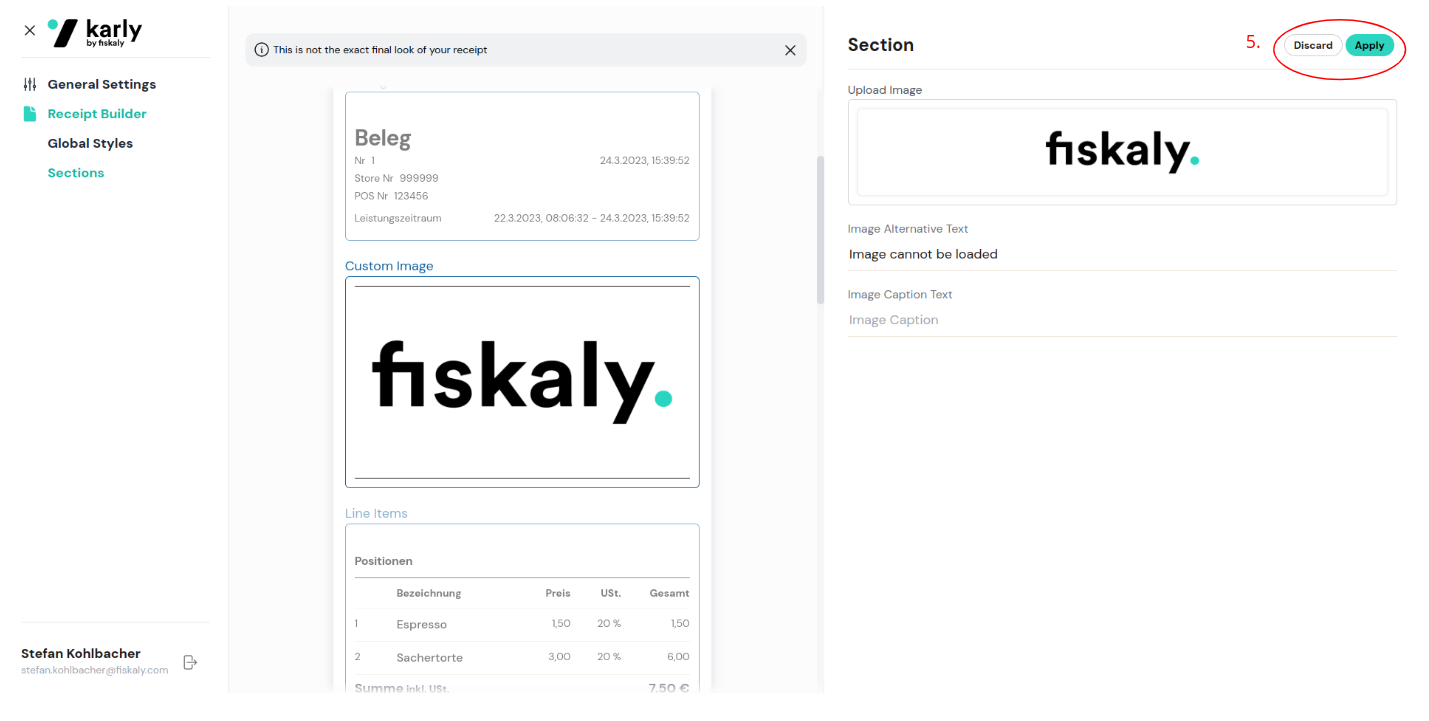
Custom-sections of type IMAGE represent a way to add custom images to the digital receipt. Images are scaled to the width of the receipt. In addition, image description and text can be added via the field label. The following image types are allowed: PNG, JPEG, JPG, WEBP, GIF.
How to upload and re-use images in custom-sections:
-
Upload an image via the UploadMedia API endpoint.
-
Save the id and the media_location obtained in UploadMedia response.
-
Create a custom-section with type IMAGE, either by adding it in the custom_elements array during receipt creation, or by configuring a default custom-section.
-
Create the custom-section by passing the content of type *CustomMediaContent. *For the fields media_id and media_location pass the previously saved values from step 2.
-
Optionally, specify a label and its corresponding alignment, label_alignment. The label will be shown in addition to the image on the receipt.
-
Optionally, specify an alt_text, which is shown in case the image cannot be shown.
For more information about custom-sections have a look at this article.

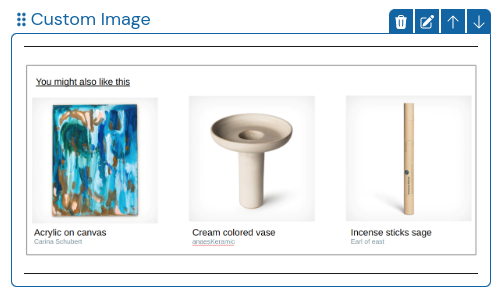
Popular use-cases
Section intitulée « Popular use-cases »- Recommending items the customer might also like [Sample]
TEXT custom-sections
A TEXT custom-section contains simple text that is added to the receipt. The text can be aligned LEFT, CENTER, or RIGHT. Furthermore, formatting of the custom-sections via simple HTML is possible. Currently, the following tags are supported:
-
Headers (h1-h6)
-
Bold text (b)
-
Italic text (i)
-
Underlined text (u)
-
Strike-through text (s)
-
Paragraphs (p)
-
Line breaks (br)
-
Links (a)
*Please note that unsupported entities will be printed as HTML strings, as opposed to being rendered.
A sample custom-section including html-formatting would look like this:
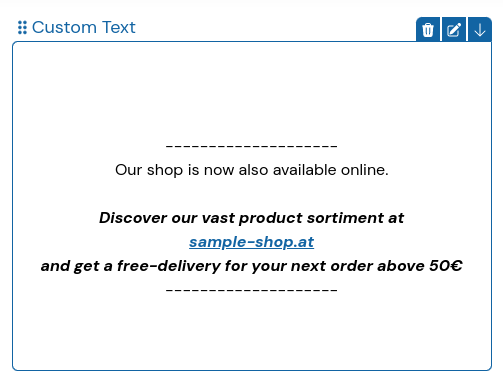
<br><br>--------------------<br>Our shop is now also available online. <br><br><b><i>Discover our vast product sortiment at <br><a href="https://sample-shop.at">sample-shop.at</a> <br>and get a free-delivery for your next order above 50€</i></b><br>--------------------<br><br>
For more information about custom-sections have a look at this article.
Popular use-cases
Section intitulée « Popular use-cases »What are custom-sections?
Custom-sections (also referred to as custom_elements) are a way to add additional custom content on the receipt. This can be interesting if you want to add a custom message for a specific customer, or alternatively you would like to make the customer aware of for e.g. a summer-sale.
A custom-section can exist in various types:
TEXT

IMAGE
QR_CODE

For more information on QR_CODE custom-sections and how to use them, check out this article.
BAR_CODE
For more information on BAR_CODE custom-sections and how to use them, check out this article.
The position of the custom-sections on the receipt is defined via the parameters orientation and position, position references a nearby receipt-section and orientation specifies the relative orientation to the receipt-section.
How to add custom-sections?
Section intitulée « How to add custom-sections? »Custom-sections can be added for each receipt individually, which is useful for one-time messages. One time custom-sections are added directly in the API call (schema.ekabs_v0.custom_elements) when creating a receipt.
Custom-sections can also be configured as default for a specific time-frame, which comes in handy for generic messages. Default custom-sections can be configured either via the API, or via the UI of the merchant dashboard. We recommend to invite the merchants as collaborators to their organization in the dashboard, so they can configure the custom-sections themselves, and doesn’t require intervention from the POS vendor.
How to add a custom-section via API?
Section intitulée « How to add a custom-section via API? »-
Choose the type of custom-section you want to add: TEXT, IMAGE, QR_CODE, or BAR_CODE
-
Create an array of CustomElements objects, whereas the object contains the following data:
{ "alignment": "TEXT", "content": *CustomElementContent | CustomMediaContent*, "orientation": "BEFORE", "position": "HEAD",}content can be either of type CustomElementContent or CustomMediaContent, which is composed of the following data fields:
*CustomElementContent* {  "data": "string",  "encoding": "CODE128",  "type": "BAR_CODE"}
*CustomMediaContent* { "alt_text": "string", "label": "string", "label_alignment": "ABOVE", "media_id": "00000000-0000-0000-0000-000000000000", "media_location": "string", "type": "IMAGE"}-
For more details on how to create custom-sections of type IMAGE, see this article.
-
Add the constructed object to the array in schema.ekabs_v0.custom_elements
-
Create the receipt with the CreateReceipt endpoint
How to add a custom-section via the dashboard?
Section intitulée « How to add a custom-section via the dashboard? »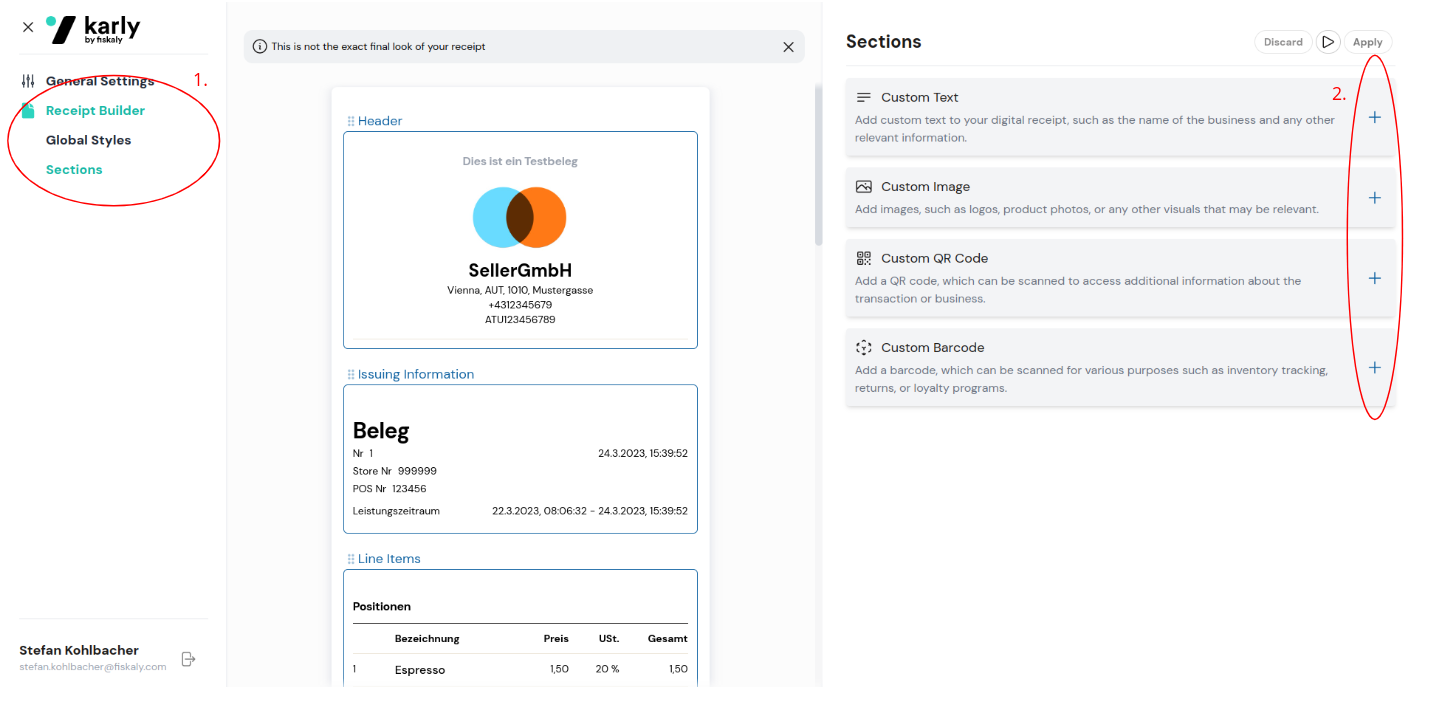
-
Select the Sections tab of the Receipt builder in the navigation bar on the left side of the screen.
-
Add a custom-section by clicking on the + icon on the right side of the screen.
-
A custom-section of the selected type will be added in its default location on the receipt.
-
Configure the custom-section in the editor on the right side of the screen. E.g. upload an image.
- Save and apply the configured changes by clicking on the Apply button in the top-right corner of the screen. Hint: You need to apply the changes twice. Once to apply changes of the custom-section, and another time to set the configured custom-section as default for your receipts.
Popular use-cases
Section intitulée « Popular use-cases »How is the digital receipt issued to the consumer?
The digital receipt can be issued to the consumer in various ways, depending on the merchant’s preference. The following options are possible:
-
Dynamic QR code
-
Static QR code
-
SMS / Email
-
Loyalty card
What is the dynamic QR code?
The dynamic QR code is a simple, intuitive and anonymous way for the consumer to receive the digital receipt on his/her phone. After successful payment, a QR code is shown on a consumer-facing display in the store. This QR code can be scanned by the consumer, which opens a web-page containing the digital receipt.
What is the static QR code?
The static QR code provides a clever alternative to merchants who do not have a consumer-facing display, but nevertheless want to issue their consumers a digital receipt.
In order to do so, a QR code that is unique to the store is generated once in the merchant dashboard. This QR code is printed and placed next to the cash register in the store. Anytime during the checkout process, consumers are able to scan this QR code.
Scanning this QR code directly opens a web-page on the consumer’s device, which generates a time-limited unique code. This code is then entered into the POS system by the cashier.
After successful payment, during the creation of the digital receipt, the code will be used to unambiguously allocate the receipt to the relevant consumer.
Once the digital receipt is created, the web-page on the consumer’s device refreshes and the digital receipt is shown.
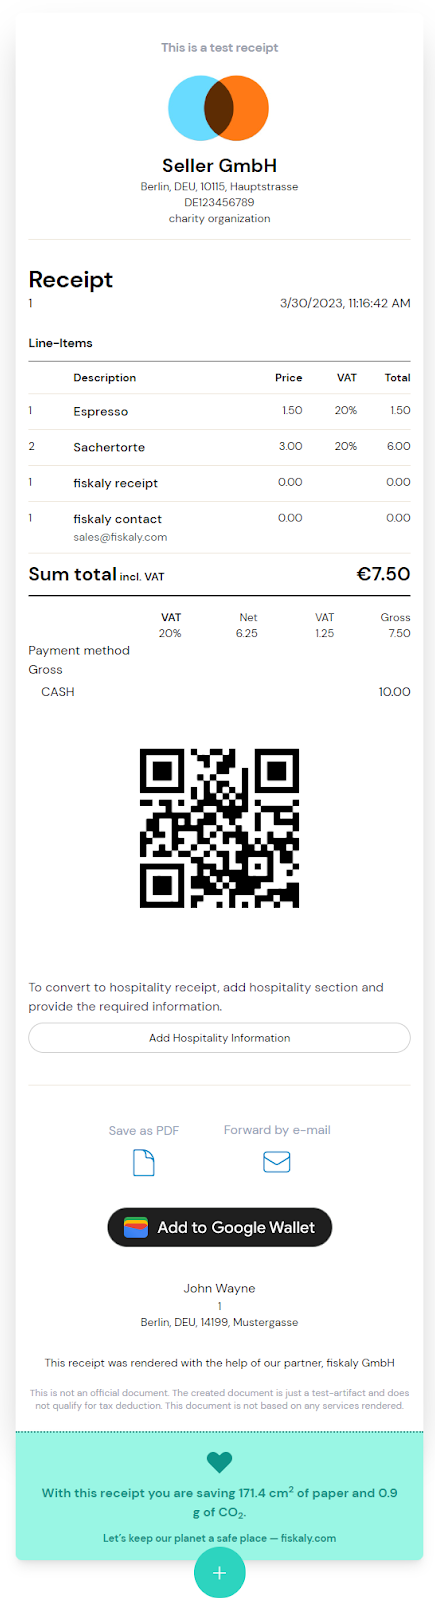
How can I as a consumer store my digital receipt?
Consumers have the following options in order to store the digital receipt:
-
Download as PDF
-
Forward per e-mail
-
Add to Google Wallet
-
Add to Apple Wallet
-
fiskaly wallet (coming soon)
What is the merchant dashboard?
The merchant dashboard provides a web interface that can be used by merchants to configure and customize the digital receipt. The receipts can be configured for each store individually.
API (3)
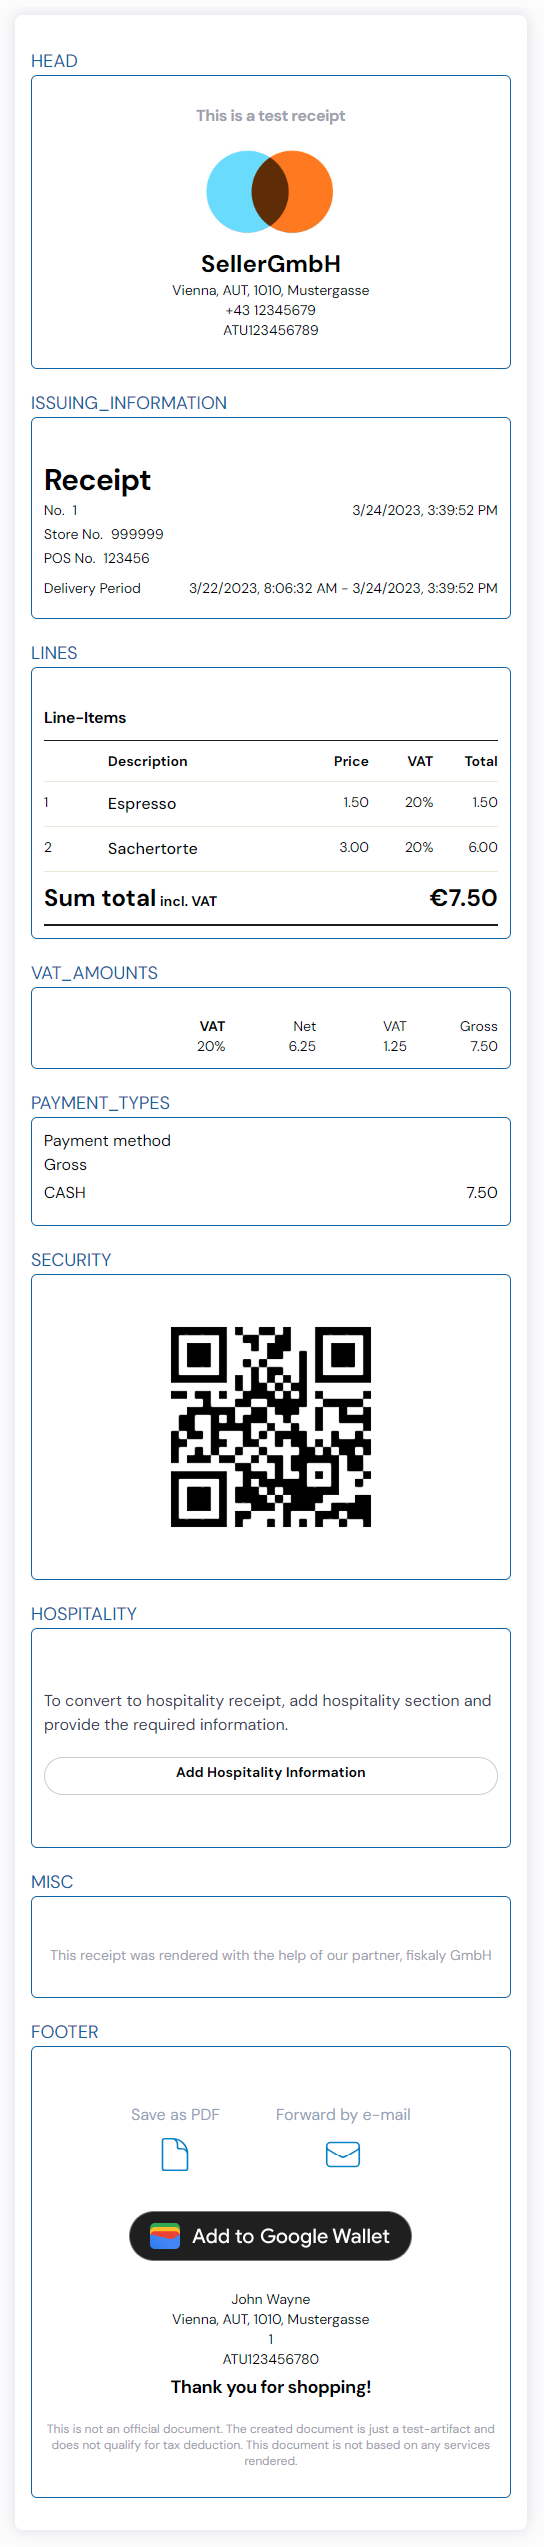
Which sections exist on a digital receipt by fiskaly?
The digital receipt by fiskaly is divided into various sections. The sections are used for a logical separation of the data and to reference the position of newly added custom-sections. The sections below are ordered by their position on the receipt:
-
HEAD
ISSUING_INFORMATION
LINES
VAT_AMOUNTS
PAYMENT_TYPES
SECURITY
HOSPITALITY
MISC
FOOTER
How to implement the static QR code
In order to utilize the static QR code for receipt delivery, the following requirements should be met:
-
Configuration of a static QR code for the organization via our API or the merchant dashboard
-
Functionality to input the code generated by the consumer into the POS system (for example by scanning the QR code or barcode during the checkout process)
-
Adding the received code during digital receipt creation in the field user_association.pending_receipt_id
Once the receipt is created, the web page on the consumer’s device will automatically refresh and show the digital receipt.
Can I already test the digital receipt API?
Yes, you can already test our openly available API for the digital receipt. In order to enable LIVE access, please contact our sales team at sales@fiskaly.com.
Countries and requirements (1)
In which countries is the digital receipt available?
The digital receipt can be implemented and issued in all European countries in which legislation allows for the replacement of a printed receipt with a digital one. Among others, these include Germany, Austria, France, and Spain.
Mobile wallets and partners (5)
How can I add digital receipts to my Google Wallet?
A digital receipt can easily be added to your Google Wallet by clicking the “Add to Google Wallet” button found at the bottom of the receipt.
How can I access the original receipt from Google Wallet?
By opening the details section of the digital receipt in Google Wallet, you can access the web-view of the digital receipt by clicking on the “Checkout your digital receipt” button at the bottom of the details section next to the small globe icon.
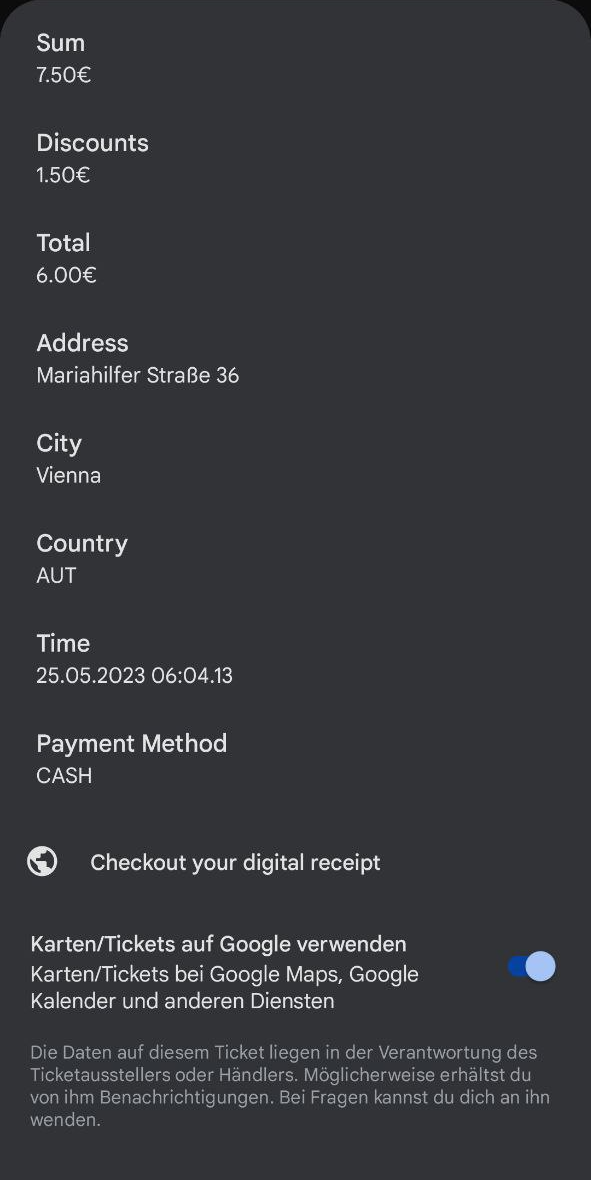
Can I download or export the digital receipt from Google Wallet?
A receipt can be downloaded and saved just like any other digital receipt of fiskaly by accessing its web-view through the details section of the receipt in Google Wallet.
Can I store digital receipts in Google Wallet even if I used a payment method other than Google Wallet (e.g. cash)?
Yes.
Any digital receipt from fiskaly can be added to Google Wallet, regardless of the payment method. Simply click the “Add to Google Wallet” button on the digital receipt after receiving it.
How are digital receipts stored and organized in Google Wallet?
The digital receipts of fiskaly that are added to Google Wallet are collected in a single group, in order to keep the wallet neat and tidy. This group will contain all previously added receipts.
Was this page helpful?