Exploring the API with Postman
The best way to explore the SIGN DE API V2 is to use an application called Postman. An alternative is to use the Linux/Unix command line tool curl.
This guide uses Postman to provide examples for all the operations needed to set up a TSS, with its associated clients and transactions. You can check the details of each request and response, and easily test different scenarios.
What is Postman?
Section titled “What is Postman?”Postman is a free software application that makes it easy to explore APIs.
A Postman collection and a Postman environment provide a test system which includes all the necessary configuration for a particular API. Simply load these two files into Postman, and you are ready to begin exploring and testing.
It’s recommended (but not necessary) to use this guide in conjunction with the fiskaly HUB.
Note that this is a test environment, for testing and evaluation. Its persistence is not guaranteed. All data from the test environment is wiped periodically without prior notice.
This is a demo for the test environment, for which you will need to create new temporary accounts used only for testing and evaluation.
If you are a customer with a V1 account, your organizations and API keys are still valid for V2. You do not need to change anything in Production!
Setting Up
Section titled “Setting Up”Download Postman
Download the free version of Postman from postman.com/downloads.
It’s available for all three major platforms: Linux, macOS, and Windows. Alternatively, there is also a web version of Postman.
Create an API Key
Before getting started with Postman, you need to create an API key and secret via the fiskaly HUB.
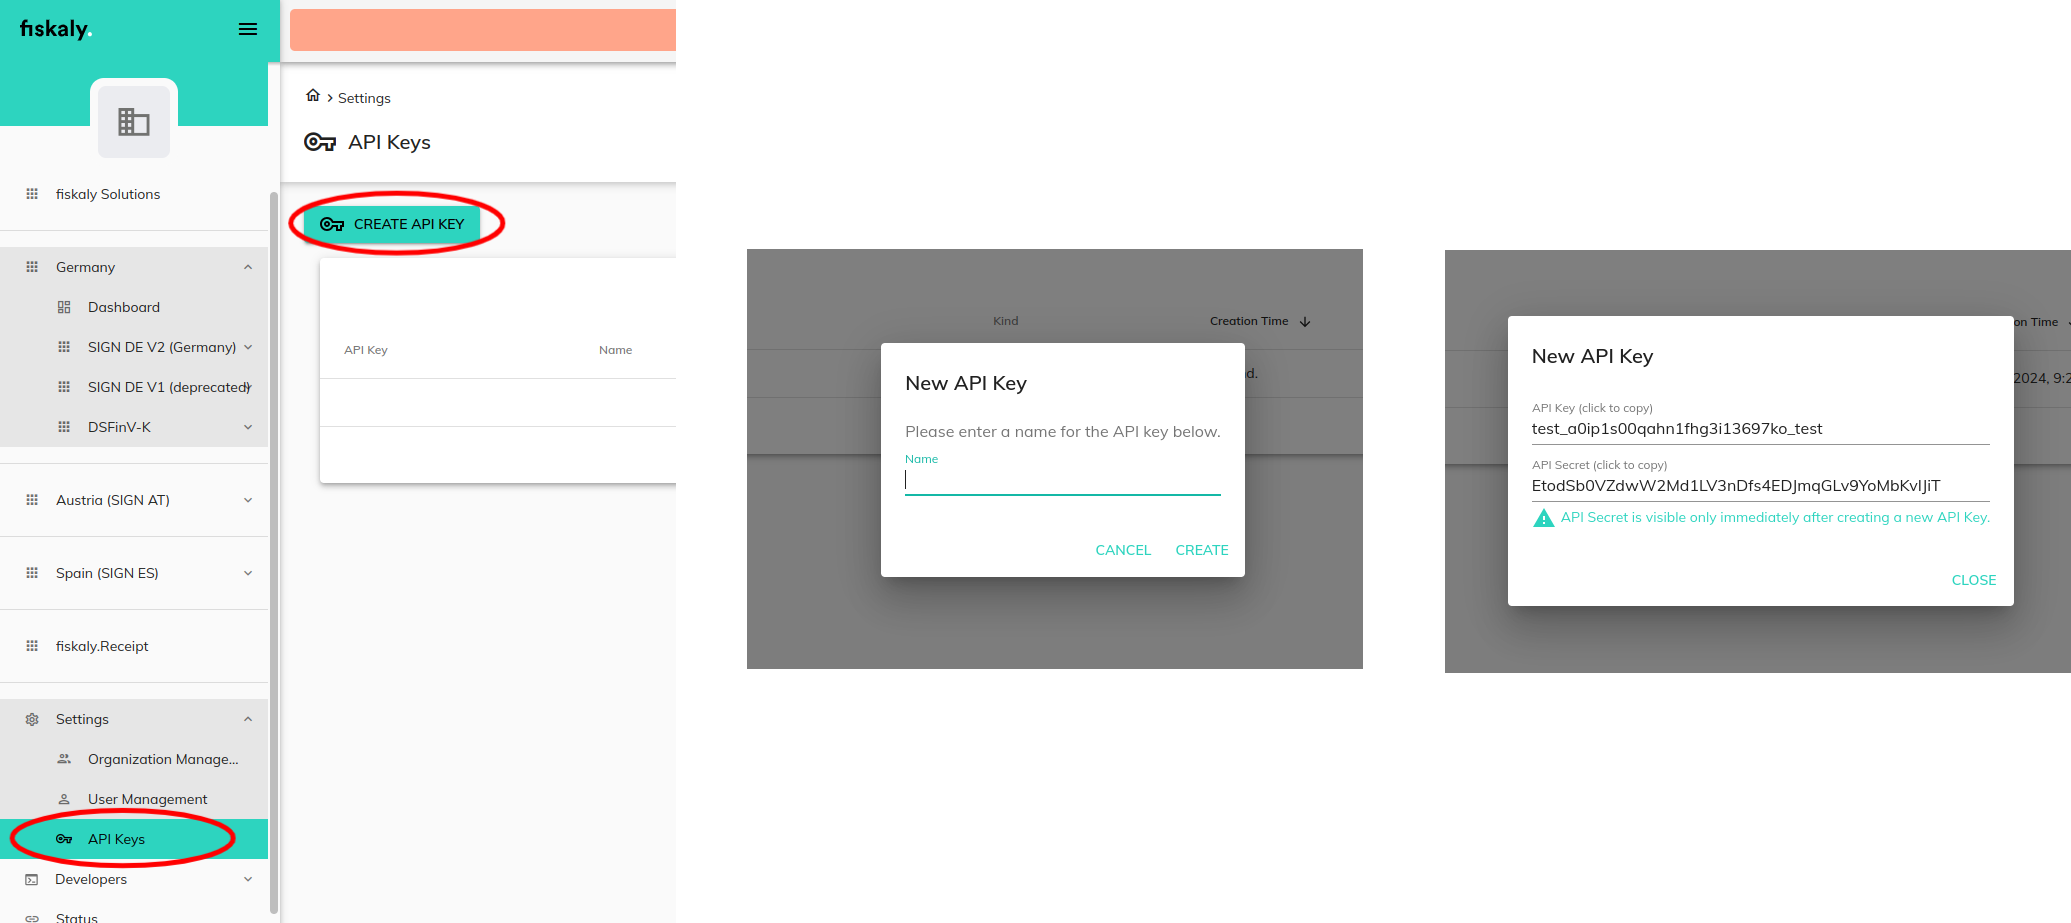
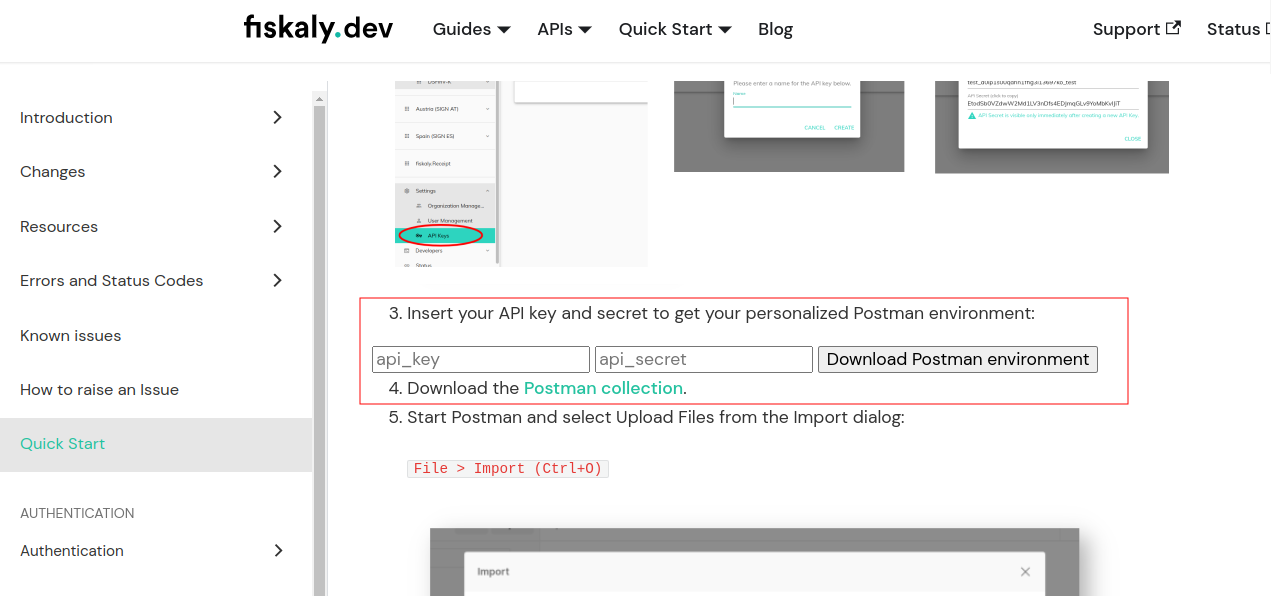
Download your personalized environment
Go to the API V2 Quick Start page and enter your API key and secret in order to obtain your personalized Postman environment.
Importing the API V2 Environment
Section titled “Importing the API V2 Environment”To explore SIGN DE API V2 using Postman, you must first import its configuration files.
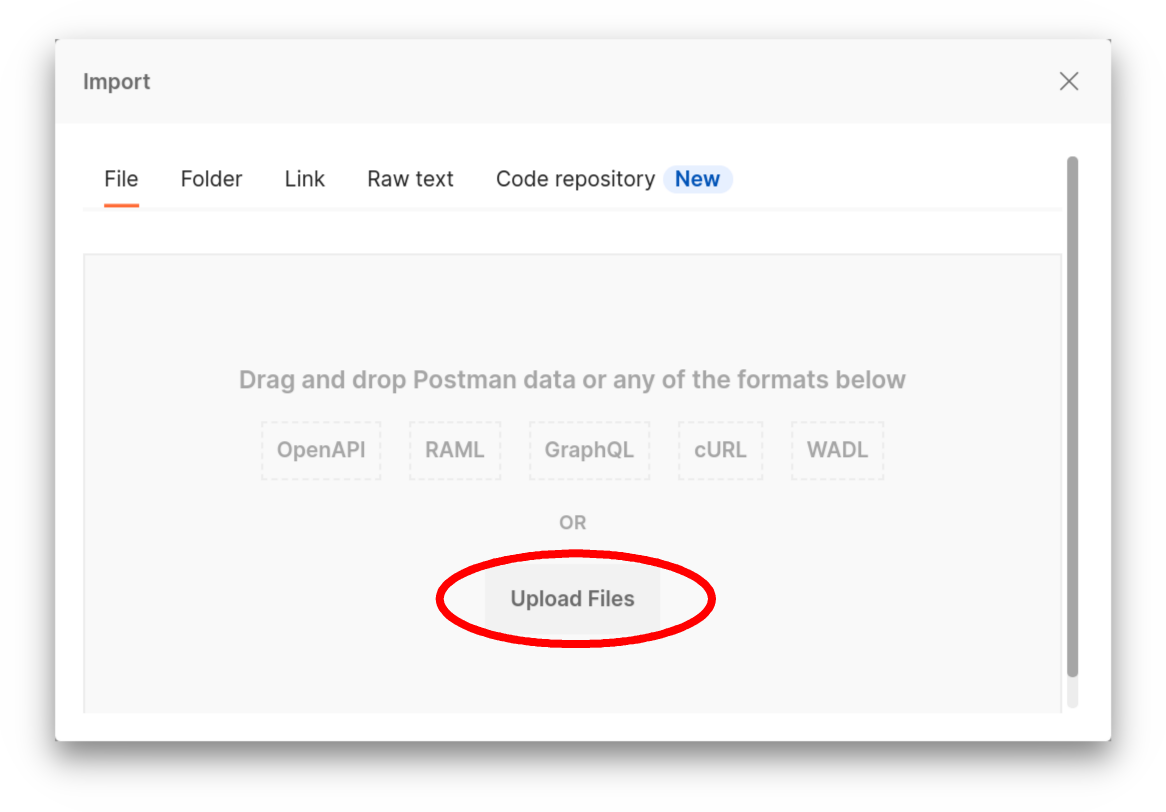
Open Postman Import dialog
Start Postman and, from the Import dialog, select Upload Files.
Select collection and environment files
Select the collection and environment files that you downloaded earlier.
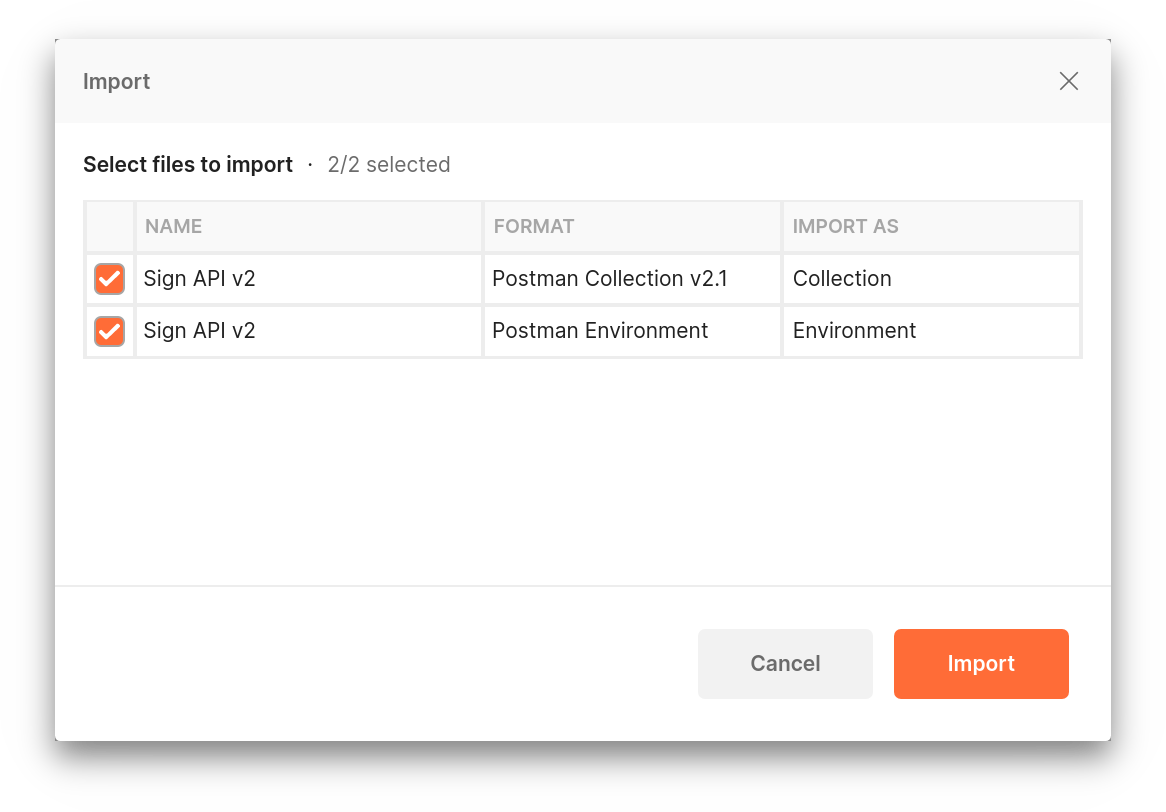
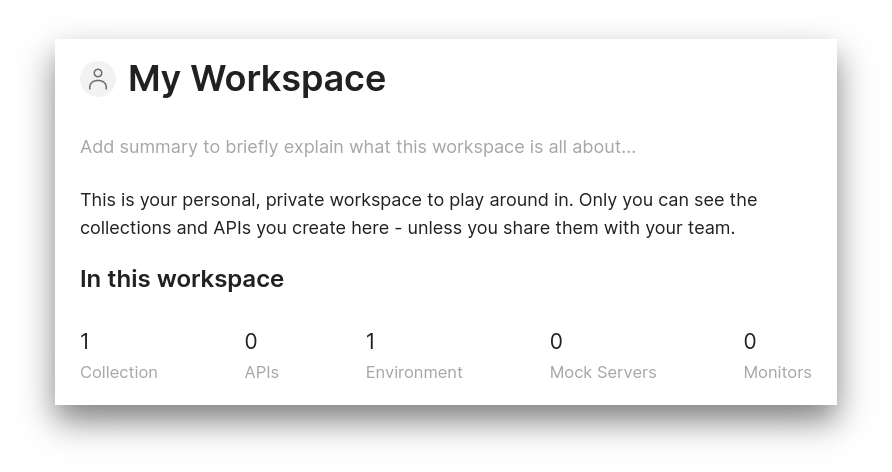
Verify your workspace
You should now be able to see 1 Collection and 1 Environment in the Postman workspace.
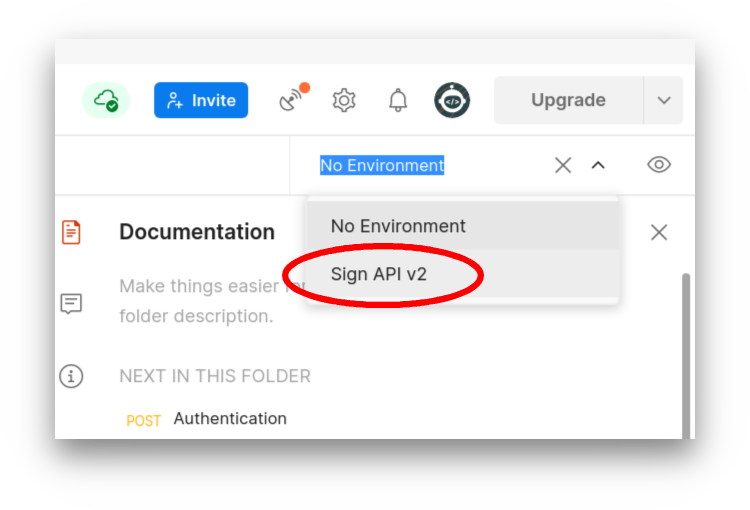
Select the environment
Select the SIGN DE API V2 environment from the environment dropdown.
To ensure that you are using the most up-to-date version of the production API, download the latest collection and environment files from the API V2 Quick Start page.
Running the Demo
Section titled “Running the Demo”The Postman API V2 Collection includes comprehensive examples of every request involved in setting up a TSS environment, from initial authentication through to data exports.
You can run these requests using Postman’s Collection Runner.
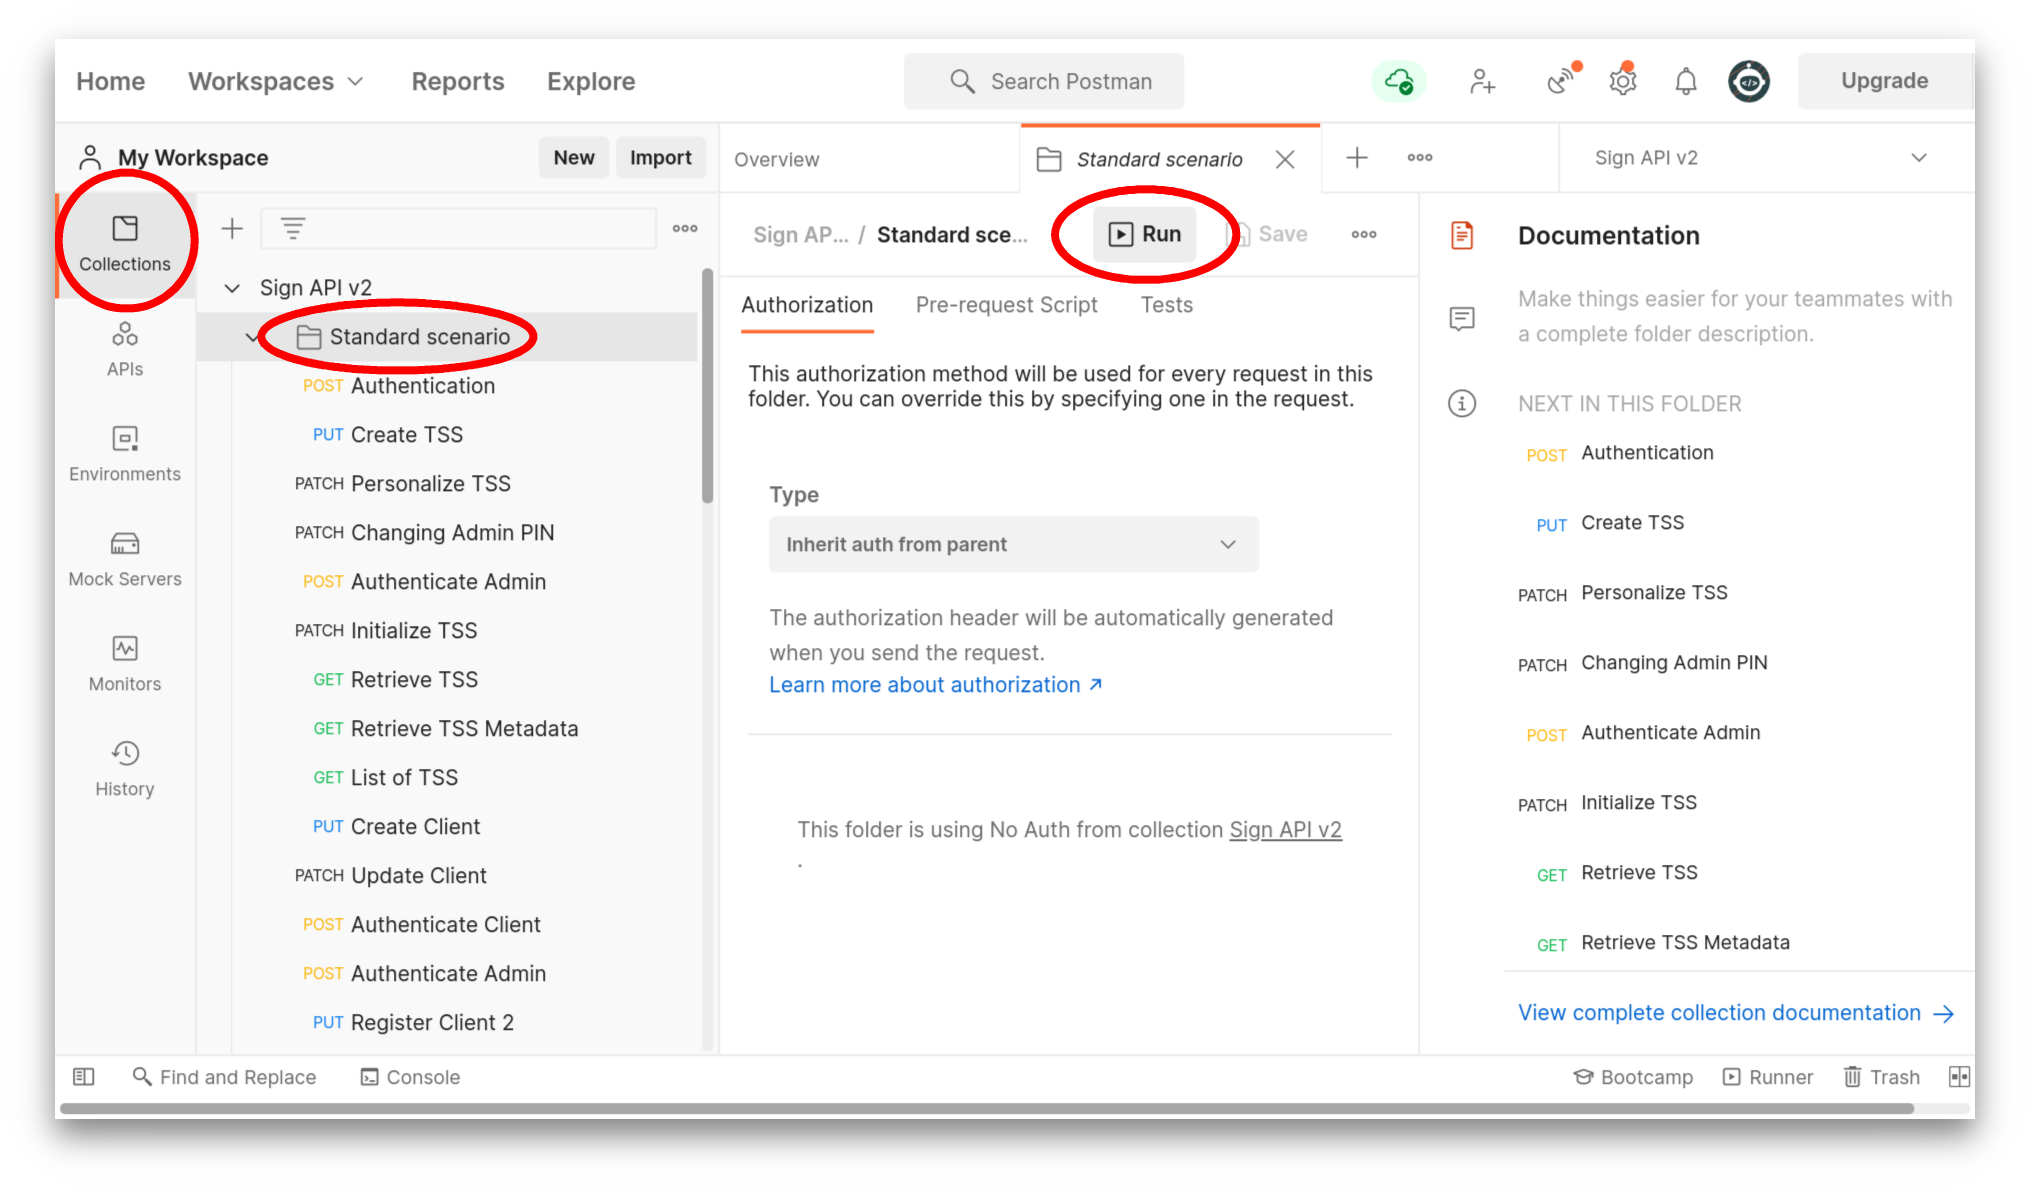
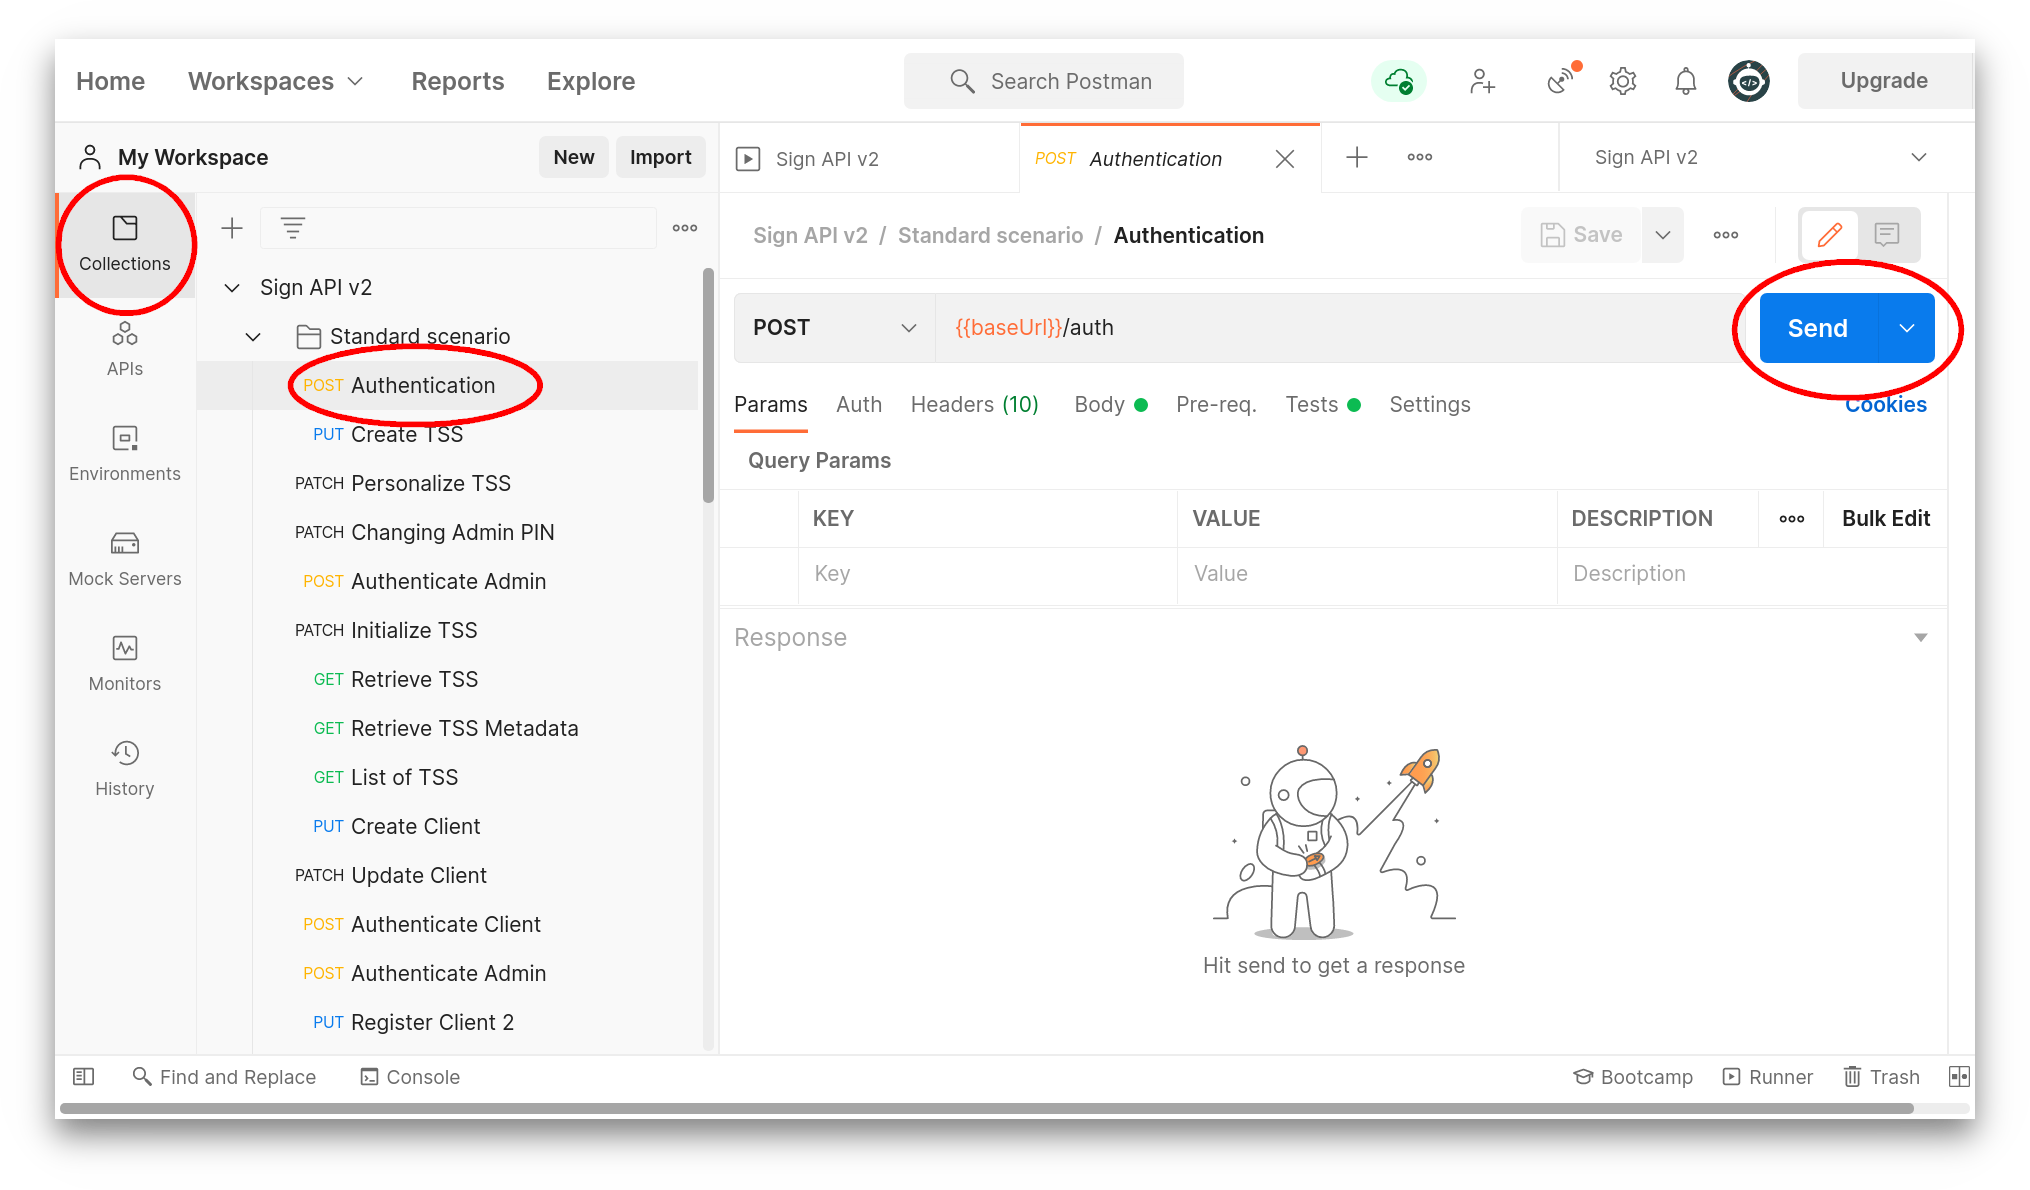
Open the Collection Runner
Select Collections, then Standard scenario, then click the Run button.
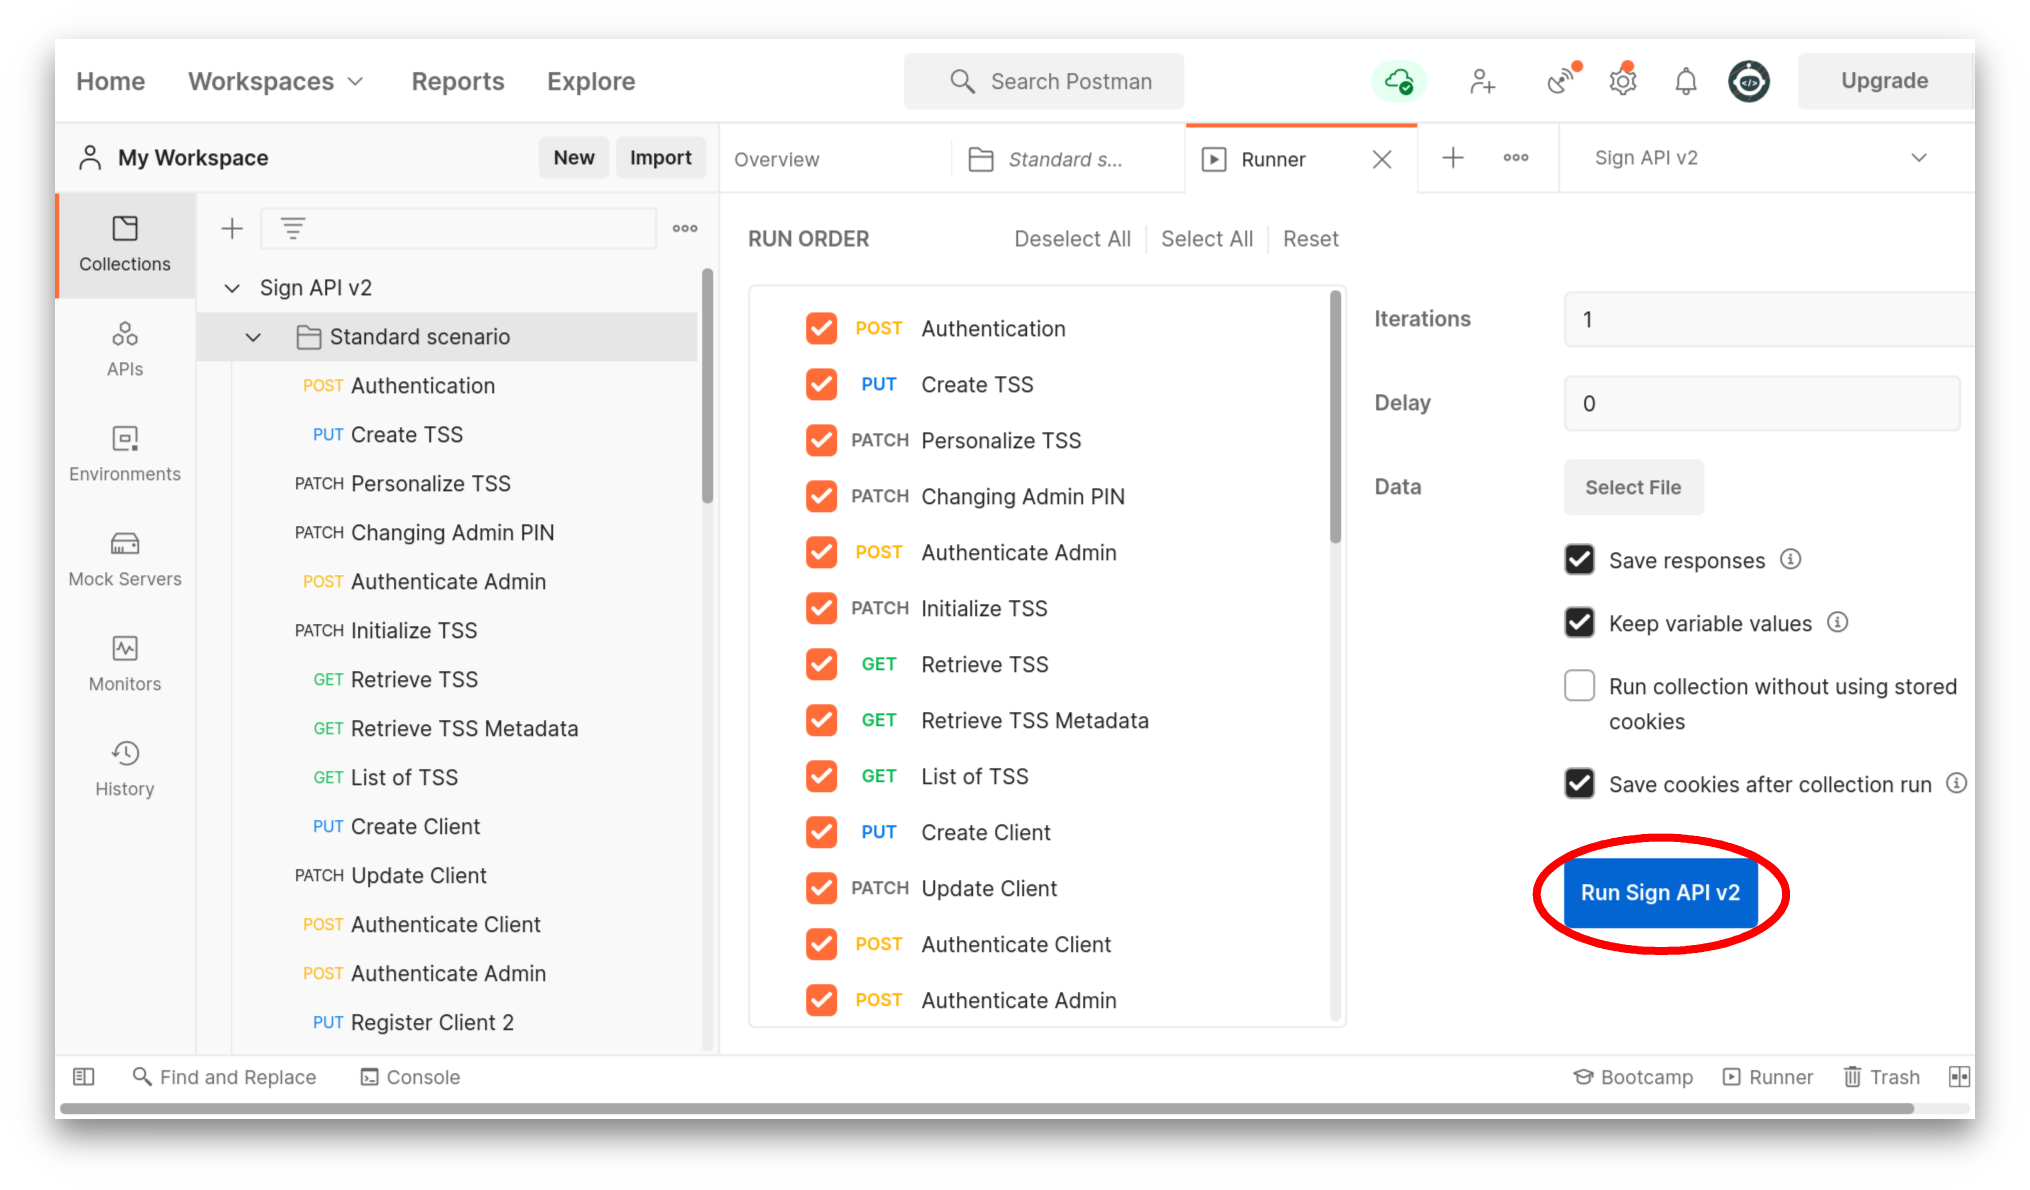
Run the collection
Postman lists the set of requests to be run. Click the Run SIGN DE API V2 button.
Check the results
You should see a
200status code from the server for each request, indicating that the request was successful.
Other possible responses include
400(problem with the request) or500(problem with the server).
The demo shows the order of requests for:
- Initial Admin authentication
- Creating and managing a TSS
- Creating and managing clients
- Transactions
- Exporting data from the TSS
The following sections examine these requests in more detail.
Understanding Variables
Section titled “Understanding Variables”Postman stores important API values in variables. Variables can be reused in different requests. If you change the value of a variable, the new value is used across all those requests.
When you first import the SIGN DE API V2 environment, it contains just three variables:
| Variable | Description |
|---|---|
baseUrl | The API base URL |
api_key | Your API key |
api_secret | Your API secret |
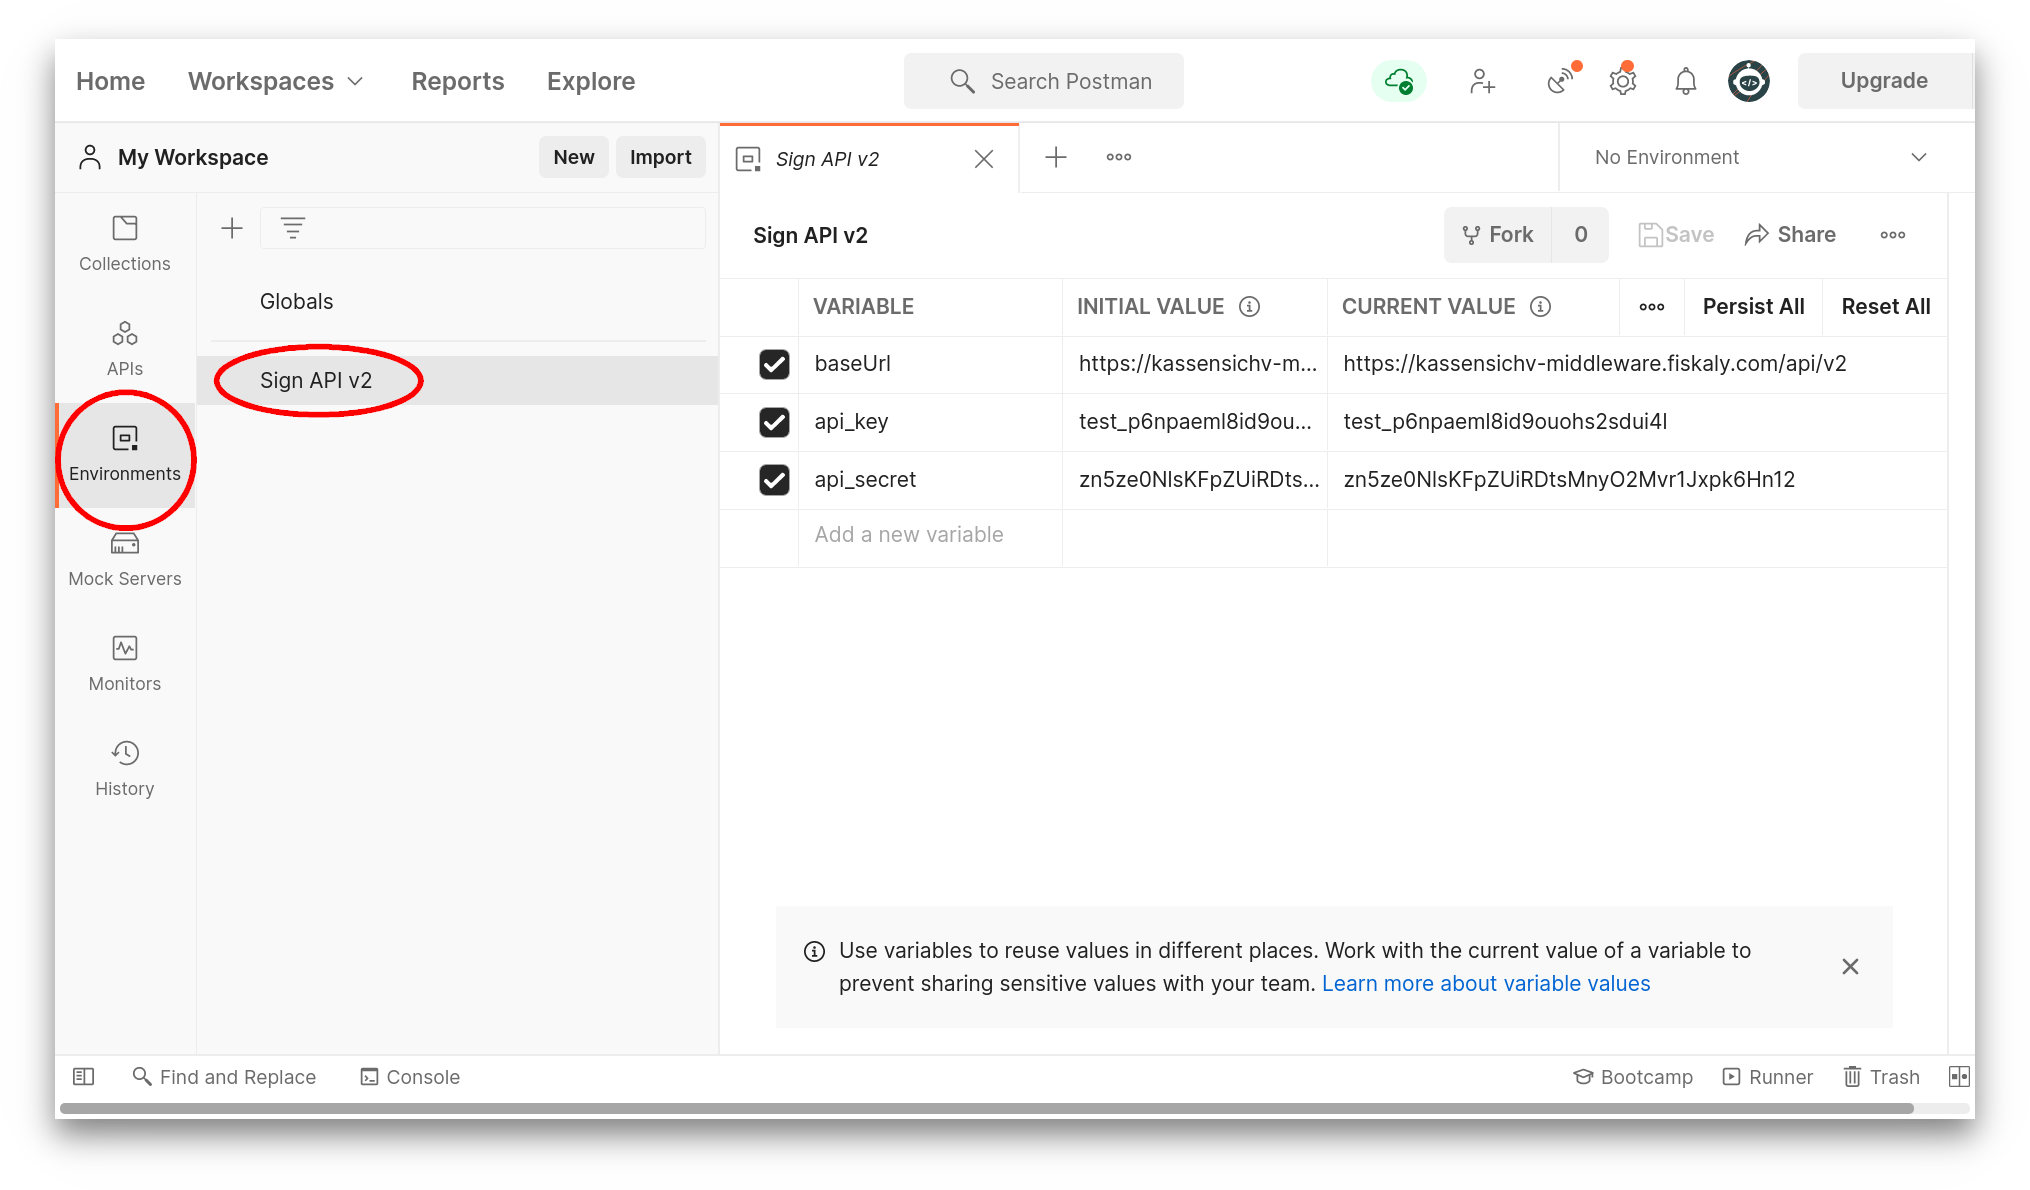
You can see how a variable is used in an Authentication request. Postman substitutes the variable {{baseUrl}} with the value stored in the SIGN DE API V2 Environment:
https://kassensichv-middleware.fiskaly.com/api/v2So an authentication request is actually POSTed to:
https://kassensichv-middleware.fiskaly.com/api/v2/auth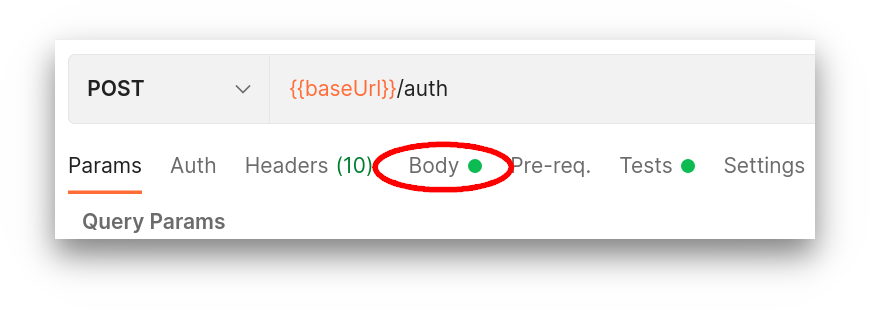
Making Requests
Section titled “Making Requests”Let’s make an authentication request. It is a POST request sent to {{baseUrl}}/auth.
The request body uses environment variables:
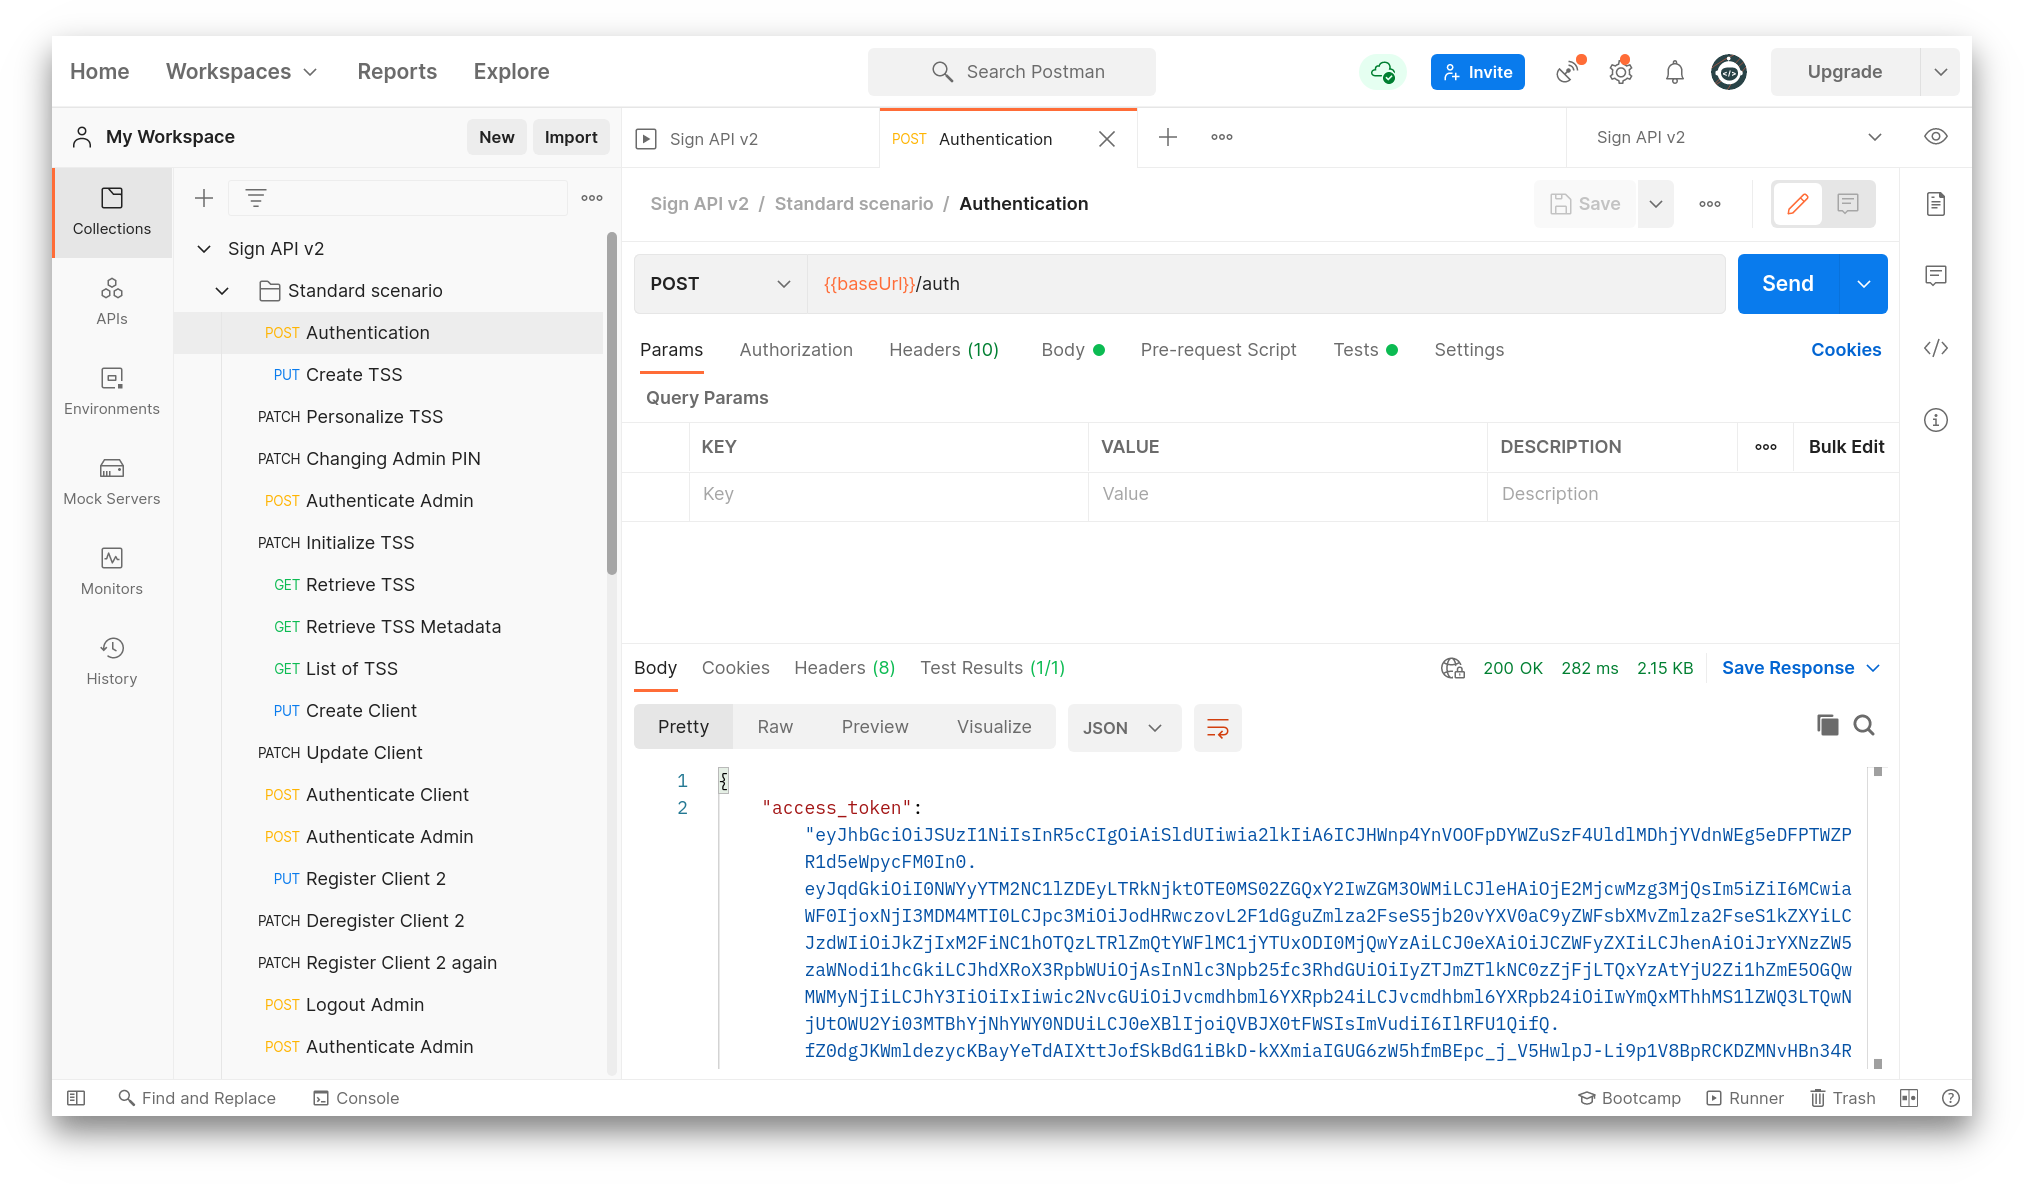
{ "api_key": "{{api_key}}", "api_secret": "{{api_secret}}"}Postman receives the following response from the server (green 200 OK indicates success):
{ "access_token": "eyJhbGciOiJSUzI1NiIs...", "access_token_claims": { "env": "TEST", "organization_id": "0bd118a1-eed7-4065-9e6b-710ab3aaf445" }, "access_token_expires_in": 600, "access_token_expires_at": 1626678863, "refresh_token": "eyJhbGciOiJIUzI1NiIs...", "refresh_token_expires_in": 600, "refresh_token_expires_at": 1626678863}We obtain an access token and a refresh token. Postman stores the new values in variables, which are then used in subsequent requests.
The access token expires in 600 seconds in the test environment, after which the authentication request must be run again. In production, this is around 24 hours.
You can similarly see the header and body, and check the server’s response, for all the other requests in this collection.
Code Generation
Section titled “Code Generation”Postman can generate the relevant code to make requests in a variety of programming languages.
In this example, we’ll generate the appropriate authentication request for curl.
Run the authentication request
Re-run the authentication request from the collection.
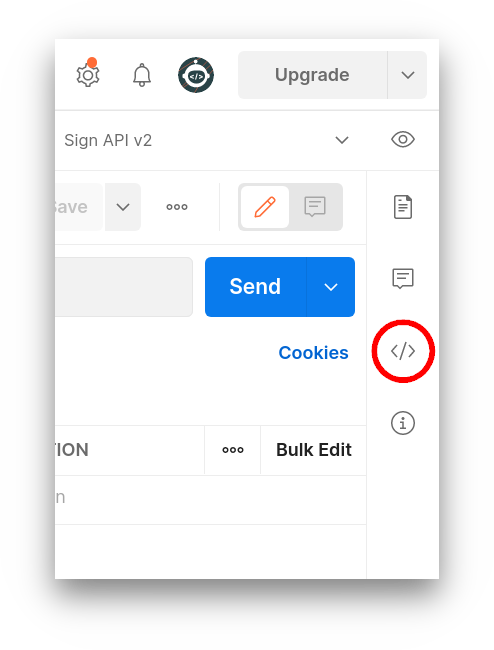
Open Code snippet sidebar
Click on the Code icon in the right sidebar.
Select your language
The Code snippet sidebar pops up.
curlshould be selected by default; if not, use the dropdown menu to select it.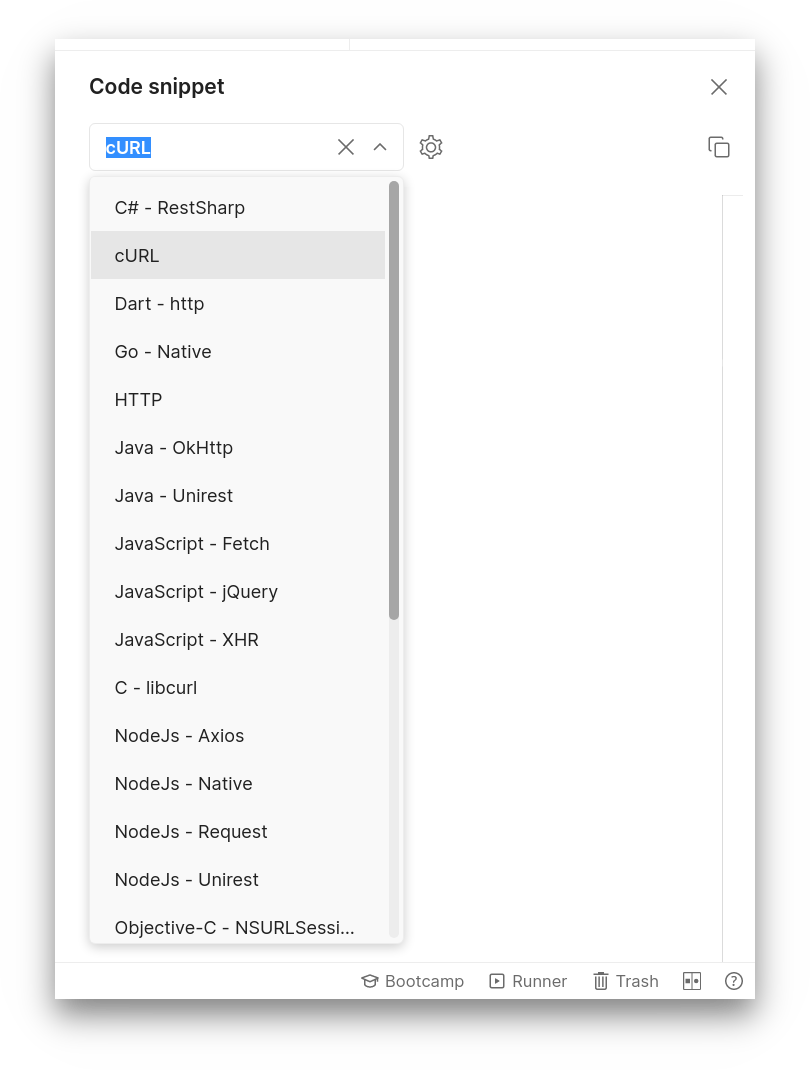
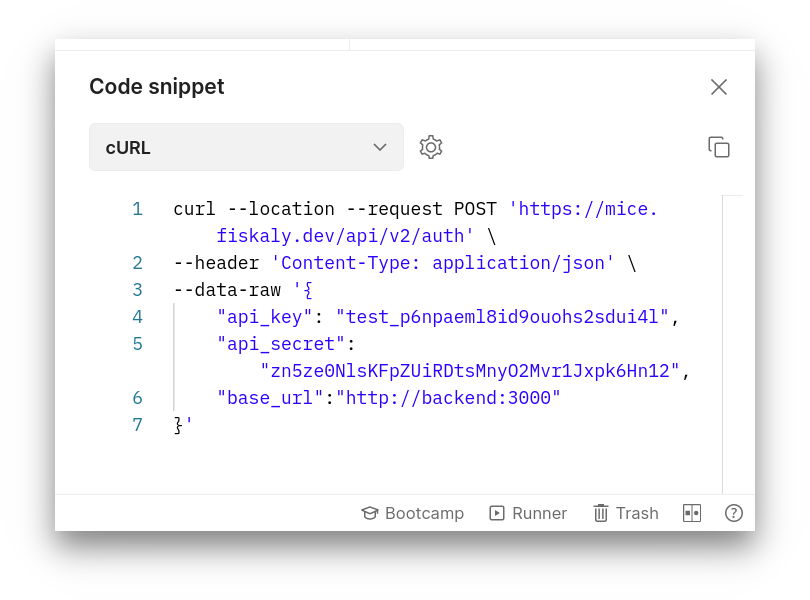
Copy and use the generated code
You can now see the curl commands that match this Postman request. Run them in a terminal to authenticate.
Code generation is valuable for bash scripts, where you can store the values of the tokens in variables. However, Postman does this automatically, which makes it a convenient tool for investigating APIs.
Cross-Referencing with the HUB
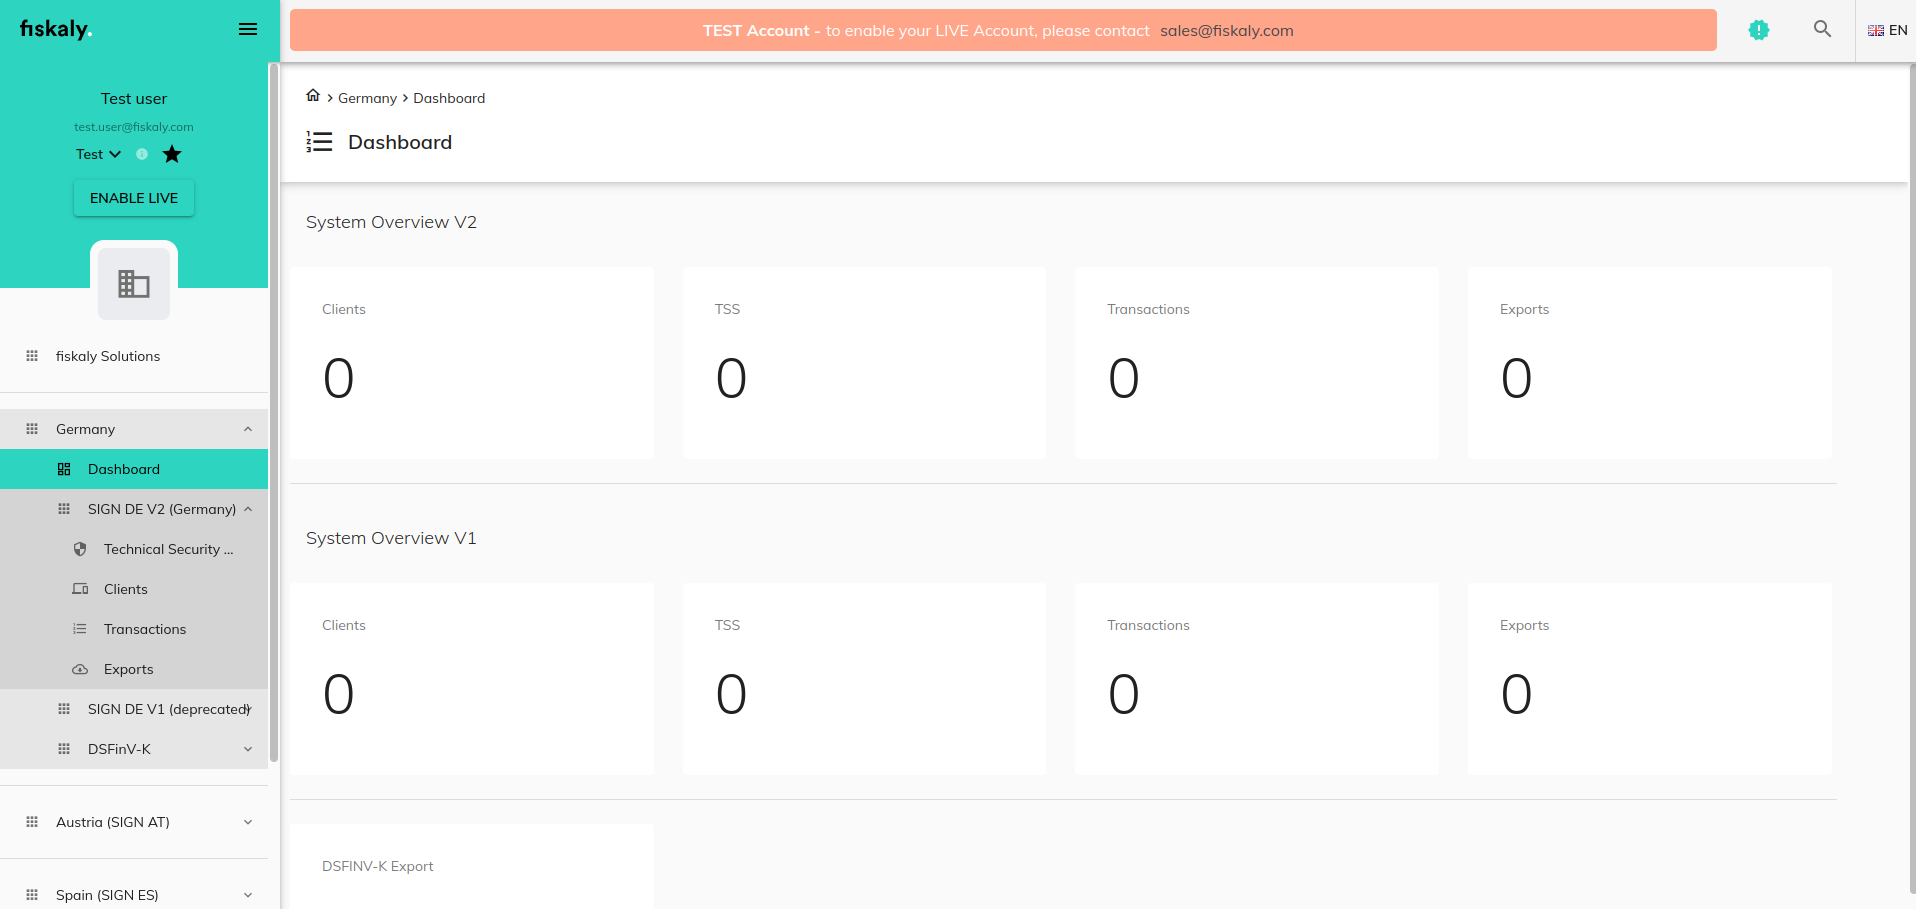
Section titled “Cross-Referencing with the HUB”TSS and Client management requests made from Postman can be viewed in the fiskaly HUB.
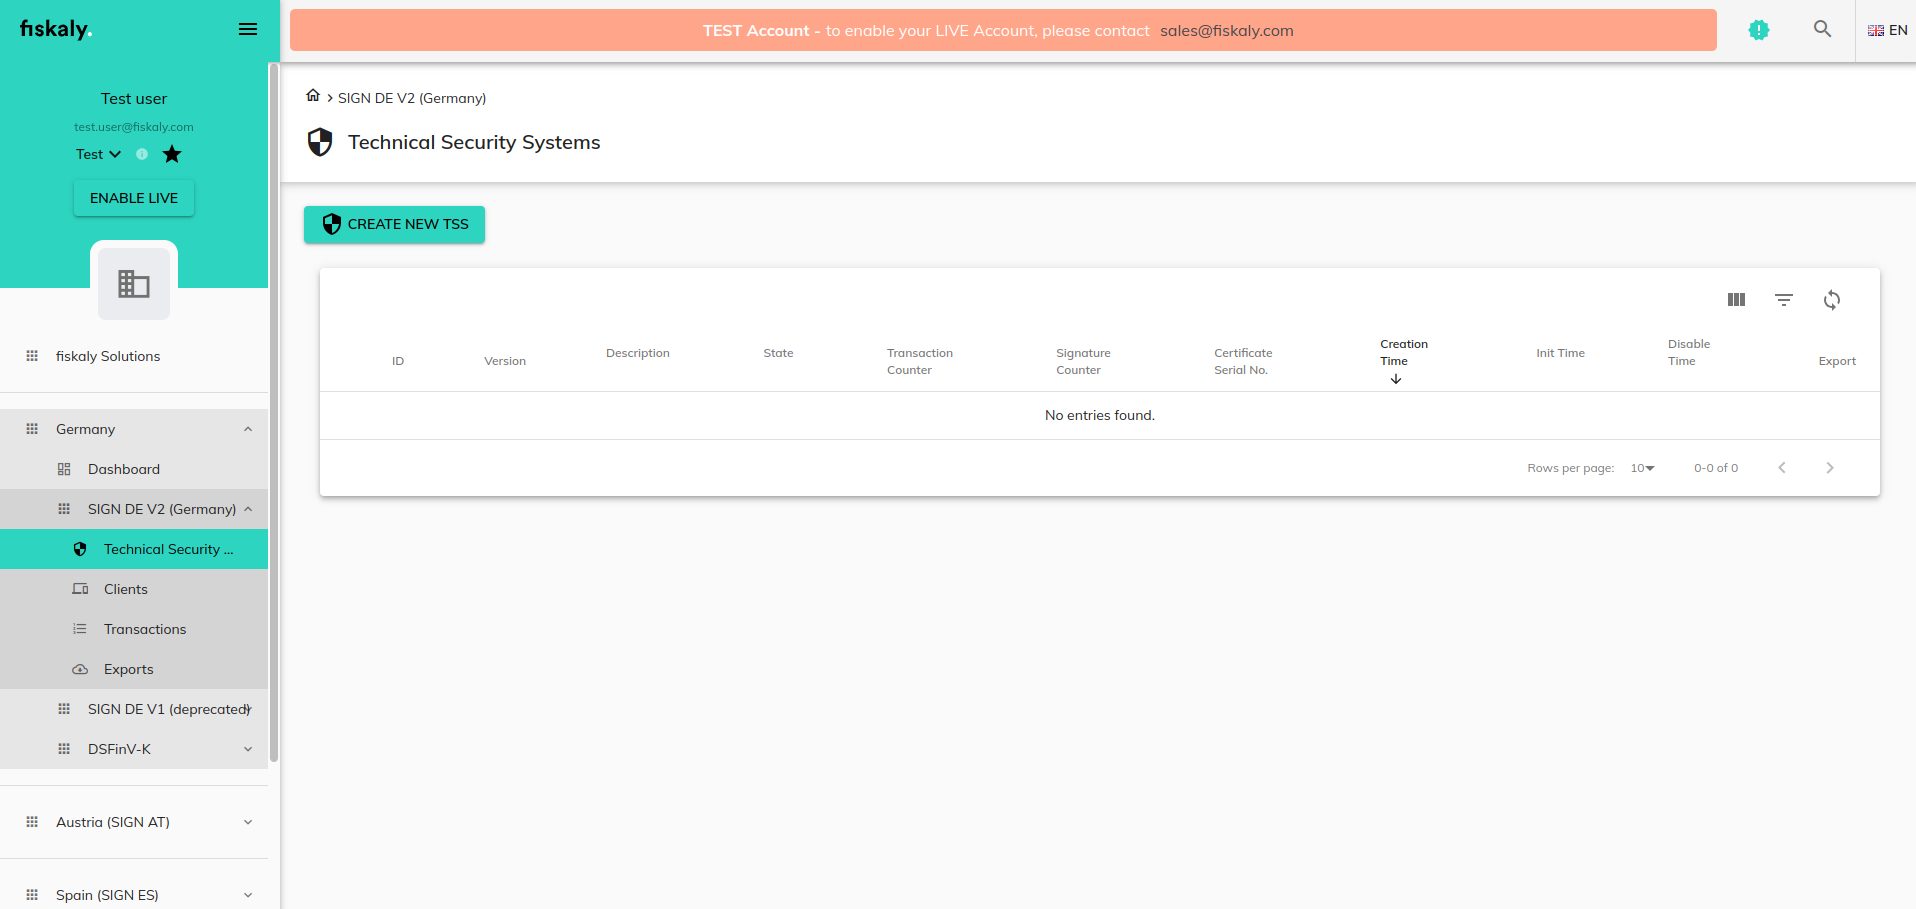
Immediately after creating a new organization, the HUB indicates that there are no Clients, TSS, Transactions, or Exports.
After sending an Authentication request followed by a Create TSS request from the Postman collection, refresh the HUB view and you will see the new TSS listed.
Further Postman operations to manage TSS and Clients are also reflected in the HUB. The fiskaly HUB provides a simpler overview of your organization and can directly manage TSS and Clients.
Use the HUB alongside Postman to verify that your API requests are having the expected effect on your organization’s resources.
Related Pages
Section titled “Related Pages”Was this page helpful?